> ## Documentation Index
> Fetch the complete documentation index at: https://docs.melonly.com/llms.txt
> Use this file to discover all available pages before exploring further.
# Getting Started
> Create a department and finish the setup wizard.
***
## What You Need
* A parent server where you're the owner or have the Administrator permission.
* A free department slot on that server, or be ready to buy a plan. See [Plans & Billing](/Department/plans).
* An icon for the department.
* Optionally, a Discord server for the department where you have the Discord Administrator permission.
***
## Create a Department
Start from your dashboard by clicking **New**, then **Department**. You can also click **Create department** in **Departments → Overview** on the parent server, which picks that server for you.
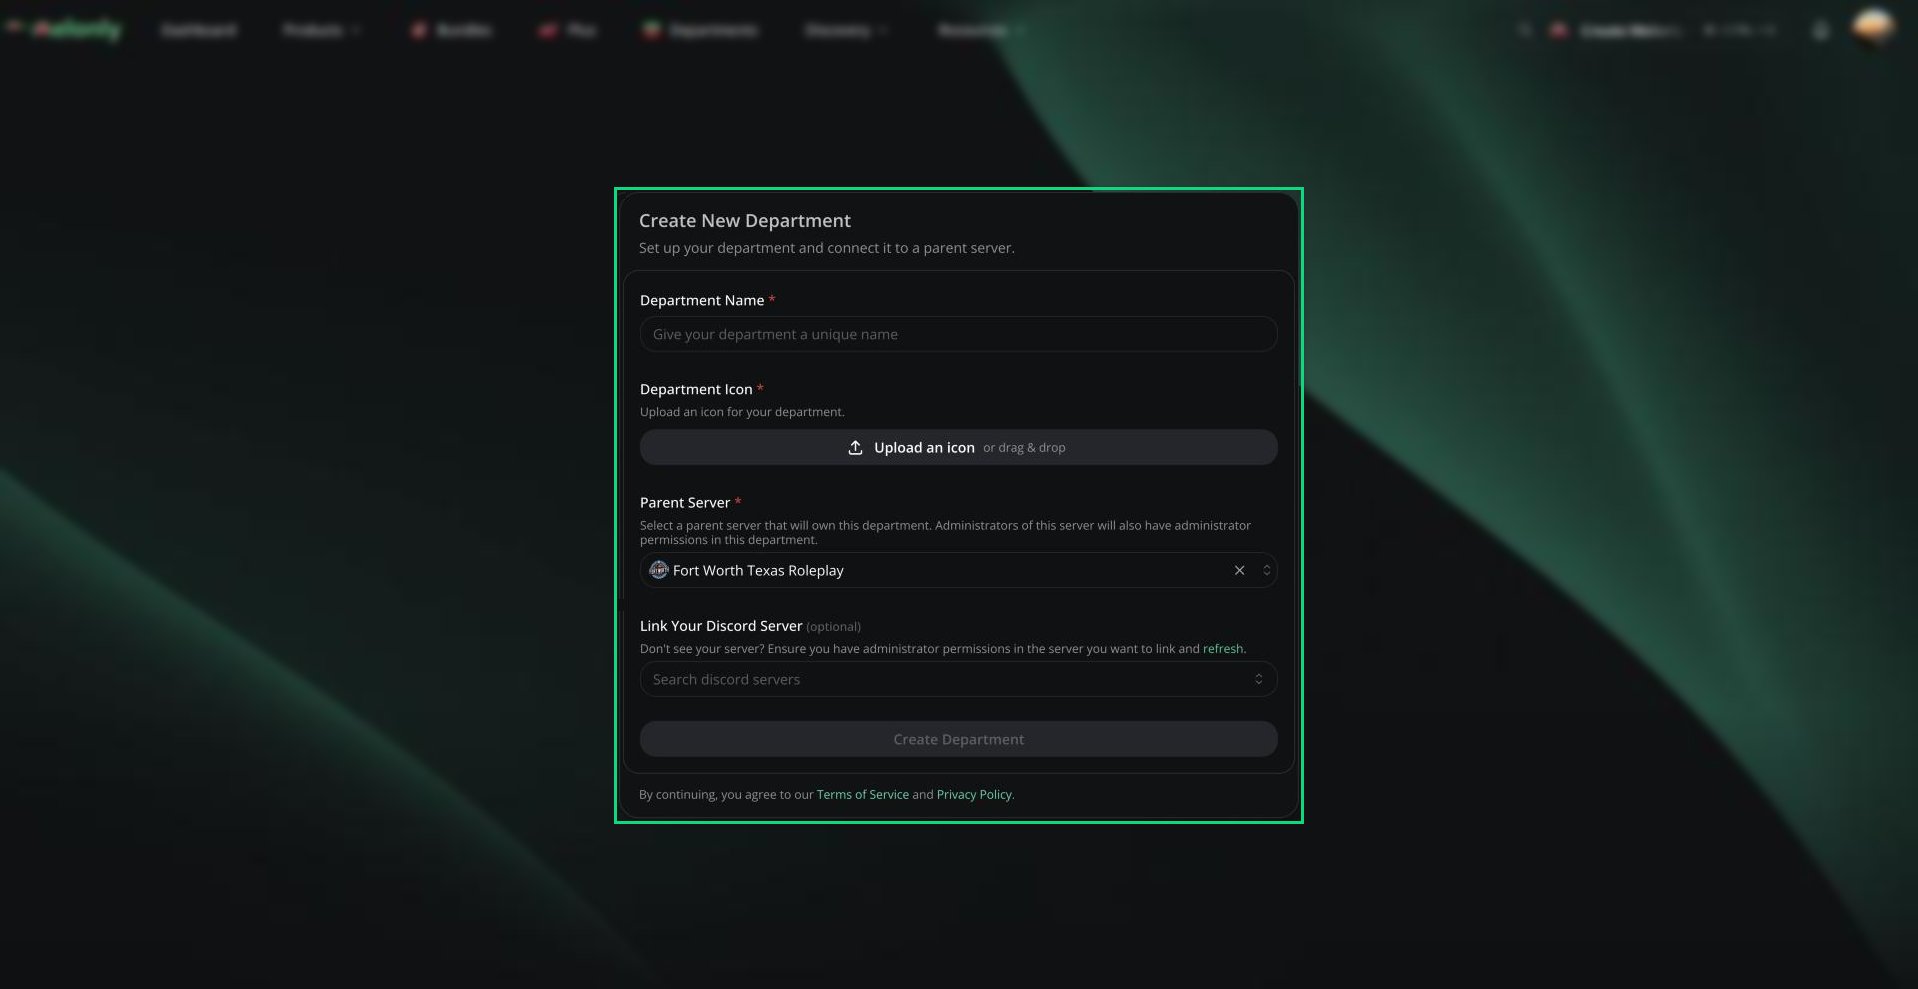 Enter a name, upload an icon, pick the parent server and, if you like, a Discord server.
If the parent server has no free slot, you'll be asked to [buy a plan](#no-free-slot) first.
If the Melonly bot isn't in your Discord server yet, you're sent to Discord to add it, then brought back.
You land on the department's Home page and the [setup wizard](#onboarding-wizard) opens.
| Field | Description |
| - | - |
| Department Name | 3 to 100 characters, with at least one letter. You can rename it later. |
| Department Icon | Required. You can change it later. |
| Parent Server | The server that owns the department. Only servers you own or administer are listed. This can't be changed later. |
| Link Your Discord Server | Optional. The department's own Discord server. |
A Discord server can only be linked to one Melonly server or department. If yours is already linked, run `/unlink` in that Discord server first.
A new department starts with you as its only member, one rank called First Rank with no permissions and a random join code. Rename that rank and set its permissions in [Ranks](/Department/roster/ranks).
### No Free Slot
If the parent server has no free slot, the create page shows the Departments plans.
Pick monthly or annual billing and a plan. Checkout opens in a new tab.
Click **Manage subscriptions** on your dashboard and activate the plan on your parent server. See [Activate a Subscription](/Department/plans#activate-a-subscription).
Come back and click **Create Department**.
Plans bought from the parent server's Departments page are attached to that server automatically, so you can skip activation.
***
## Onboarding Wizard
The setup wizard opens for administrators right after the department is created.
Law Enforcement, Fire, EMS, DOT, Dispatch or Civilian. This decides which CAD panel your members use. See [Department Types](/Department/Introduction#department-types).
Pick a Discord server and a shouts channel. Shouts then sync both ways between Melonly and that channel.
Copy your join link and share it. See [Joining a Department](/Department/joining).
Click **Save** to finish.
### Next Steps
| Task | Where |
| - | - |
| Set up ranks and permissions | [Ranks](/Department/roster/ranks) |
| Add custom roster columns | [Roster Settings](/Department/settings/roster) |
| Add pinned buttons to Home | [Pinned Buttons](/Department/settings/general#pinned-buttons) |
| Set up shift logs, roles and nicknames | [Discord Integration](/Department/settings/discord) |
| Control who can use the join code | [Join Code](/Department/settings/general#join-code) |
***
## Joining a Department
Members join with your join link or join code. See [Joining a Department](/Department/joining) for how requests and auto-join work.
***
## Convert an Existing Server
Already running a team as its own Melonly server? You can turn it into a department and keep its members, roles and most data. See [Converting a Server](/Department/converting).
***
Still have questions? Join our Discord server for support from the Melonly Team.
This documentation is built and hosted on [Mintlify](https://mintlify.com), a developer documentation platform.
Enter a name, upload an icon, pick the parent server and, if you like, a Discord server.
If the parent server has no free slot, you'll be asked to [buy a plan](#no-free-slot) first.
If the Melonly bot isn't in your Discord server yet, you're sent to Discord to add it, then brought back.
You land on the department's Home page and the [setup wizard](#onboarding-wizard) opens.
| Field | Description |
| - | - |
| Department Name | 3 to 100 characters, with at least one letter. You can rename it later. |
| Department Icon | Required. You can change it later. |
| Parent Server | The server that owns the department. Only servers you own or administer are listed. This can't be changed later. |
| Link Your Discord Server | Optional. The department's own Discord server. |
A Discord server can only be linked to one Melonly server or department. If yours is already linked, run `/unlink` in that Discord server first.
A new department starts with you as its only member, one rank called First Rank with no permissions and a random join code. Rename that rank and set its permissions in [Ranks](/Department/roster/ranks).
### No Free Slot
If the parent server has no free slot, the create page shows the Departments plans.
Pick monthly or annual billing and a plan. Checkout opens in a new tab.
Click **Manage subscriptions** on your dashboard and activate the plan on your parent server. See [Activate a Subscription](/Department/plans#activate-a-subscription).
Come back and click **Create Department**.
Plans bought from the parent server's Departments page are attached to that server automatically, so you can skip activation.
***
## Onboarding Wizard
The setup wizard opens for administrators right after the department is created.
Law Enforcement, Fire, EMS, DOT, Dispatch or Civilian. This decides which CAD panel your members use. See [Department Types](/Department/Introduction#department-types).
Pick a Discord server and a shouts channel. Shouts then sync both ways between Melonly and that channel.
Copy your join link and share it. See [Joining a Department](/Department/joining).
Click **Save** to finish.
### Next Steps
| Task | Where |
| - | - |
| Set up ranks and permissions | [Ranks](/Department/roster/ranks) |
| Add custom roster columns | [Roster Settings](/Department/settings/roster) |
| Add pinned buttons to Home | [Pinned Buttons](/Department/settings/general#pinned-buttons) |
| Set up shift logs, roles and nicknames | [Discord Integration](/Department/settings/discord) |
| Control who can use the join code | [Join Code](/Department/settings/general#join-code) |
***
## Joining a Department
Members join with your join link or join code. See [Joining a Department](/Department/joining) for how requests and auto-join work.
***
## Convert an Existing Server
Already running a team as its own Melonly server? You can turn it into a department and keep its members, roles and most data. See [Converting a Server](/Department/converting).
***
Still have questions? Join our Discord server for support from the Melonly Team.
This documentation is built and hosted on [Mintlify](https://mintlify.com), a developer documentation platform.